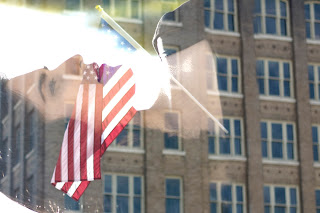
How To: Double exposure photography
One of the most challenging task I took on for my photography so far (next to trying to photograph a wedding outside in the dark with very little light) has to be double exposure, It’s a photographic technique that combines two different images into one single image to yield an often surprising or creative end result.
I wanted to share with you guys a walk through on how to create these stunning images!
1. First things first, make sure you have the right equipment. Not all cameras have the functions needed to create double exposure images. So do your research beforehand and make sure your camera is the right camera.
2. In addition to the camera itself, you can feel free to bring along a shutter release cable, a flash, a tripod and a black or white cloth that can be used as a backdrop — though these things aren’t necessary.
3. Familiarize yourself by finding out where your camera’s multiple exposure features are (check your users manual or read some tutorials online). This feature is how you’ll combine two images, into one double exposure image.
4. When you’re ready, shoot your silhouette against your backdrop or a white sky. For a beautiful result, try shooting during golden hour on a sunny day to minimize flare.
Additional Tip: Shooting up and towards the sky helps to isolate your subject.
5. After you’ve snapped your silhouette, find your background texture. This can include things like leaves, clouds, flowers — think of shapes, texture and color that will work to make your own unique image reflect your style.
6. Before you shoot the chosen texture, make sure to select your multiple exposure feature. Switch your camera to live view and display your silhouette on the LCD screen. This will help create your silhouette outline where you will place your texture.
7. Line up the images by aiming your lens at your textures subject. Like magic, this texture will appear within your silhouette.
8. You can work to achieve the effect you’re going for by adjusting your angles and exposure settings.
9. When all the components of your texture fit perfectly within that silhouette, snap your shot and watch as the camera automatically combines your two images for an incredible end result.
10. If your camera isn’t capable of shooting double exposure shots, no need to fear! You do have the option to create stunning double exposure shots in photoshop By adding layers and textures to your image, you can create dynamic multi-layered photos.
always, be willing to practice, experiment and get creative — that’s what the art of photography is about!
you can find a great visual tutorial here : https://www.picmonkey.com/blog/double-exposure


Comments
Post a Comment